There are several options for managing the vaccine inventory.
PHASE I: Record your current vaccine inventory.
Option #1
Click on the QuickLinks text, located at the top of the screen.
Select the Settings option.

- The following screen will be displayed:

- Click on the Clinical button and then select the Immunizations option.

- The following screen will be displayed:

- Select a vaccine in the section called Vaccines.
- Once selected, press the Edit button, located at the top of the screen.

- Click on the Add button, located in the Inventory Items section.

- Verify the name of the manufacturer, which has the vaccine.

- Complete the following information on the packaging, inventory on hand, lot number, dose, NDC and expiration date, according to the vaccine packaging.

- If the supplier has the same vaccine with another manufacturer, it should be recorded, repeating the above steps.
- Once you have completed recording the information, press the Save button to save the changes on the screen.

Note: You will need to restart the system to save the inventory configuration.
PHASE II: How will it work?
Inventory Before
- Go to the clinical evaluation of the patient.
- Record the patient's vaccination.

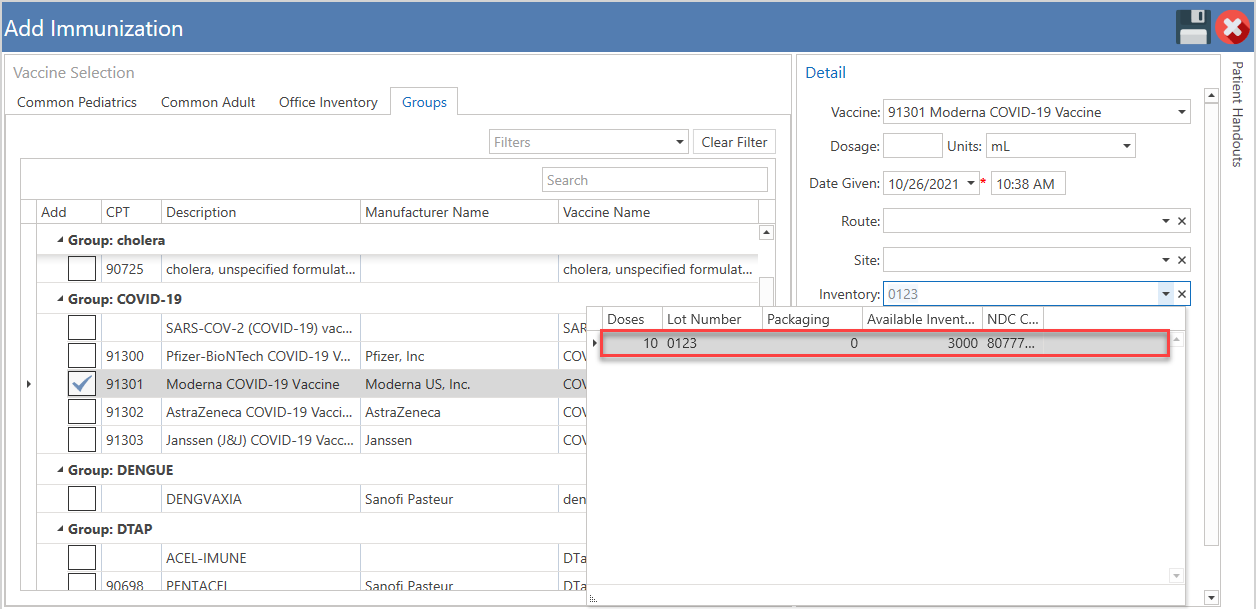
- Record the dose information, date being administered and other fields.

- Automatically, the configured inventory will be displayed. If there is more than one manufacturer, select from the list.

- Press the Save button to save the changes.

- The following screen will be displayed:

- Press the Yes button to bill the selected vaccine code.
- Press the No button to cancel the action.

Option #2
- Press the Settings button in the main menu.

- The following screen will be displayed:

- Click on the Clinical button and then select the Immunizations option.

- The following screen will be displayed:

- Select a vaccine in the section called Vaccines.
- Once selected, press the Edit button, located at the top of the screen.

- Click on the Add button, located in the Inventory Items section.

- Verify the name of the manufacturer, which has the vaccine.

- Complete the following information on the packaging, inventory on hand, lot number, dose, NDC and expiration date, according to the vaccine packaging.

- If the supplier has the same vaccine with another manufacturer, it should be recorded, repeating the above steps.
- Once you have completed recording the information, press the Save button to save the changes on the screen.

Note: You will need to restart the system to save the inventory configuration.
PHASE II: How will it work?
Inventory Before

- Go to the clinical evaluation of the patient.
- Record the patient's vaccination.

- Record the dose information, date being administered and other fields.

- Automatically, the configured inventory will be displayed. If there is more than one manufacturer, select from the list.

- Press the Save button to save the changes.

- The following screen will be displayed:

- Press the Yes button to bill the selected vaccine code.
- Press the No button to cancel the action.

Recommended Article:
- Learn More About: Settings / Clinical / Immunizations Settings